MetalsAlloy
How Can You Minimize Warpage When Heat Treating Thin Metal Parts?
Published:
Direct Answer: Key Practices for Minimizing Warpage in Thin Metal Heat Treatment
The most effective way to minimize warping when heat treating thin metal parts is a combination of process control and planning: use well-designed fixturing to support and constrain parts, carefully manage both heating and cooling rates, select the least aggressive quenching method suitable for the alloy, and leave extra material for post-treatment surface grinding when tight flatness or thickness tolerance is required.
Scope of Guidance
This article focuses on thin metal parts (usually under 6 mm, often under 3 mm thick), including alloy and carbon steels (such as tool steels like A2, D2, 4140, 1018), and heat-treatable aluminum alloys (such as 6061, 7075, 2024) in plate or flat product forms. It addresses the common need for flatness after heat treat in precision components, tooling, dies, and structural elements.
Why Do Thin Metal Parts Warp During Heat Treatment?
Warpage and distortion arise mainly from:
- Mechanical and metallurgical changes during heating and transformation
- Uneven or rapid heating or cooling
- Internal stresses relieved by transformation or quench
- Lack of sufficient constraint or support
- Non-uniform part geometry (holes, sharp transitions, large section changes)
For thin or flat parts, the ratio of surface area to thickness means stresses aren’t balanced and there’s little inherent rigidity to resist movement. Even small gradients cause visible distortion.
Steel vs. Aluminum
- Steel: Distortion comes primarily from phase transformation volume changes (e.g., austenite to martensite), amplified by fast or uneven quenching.
- Aluminum: Warpage results from relief of residual stresses (from rolling or previous processing) and from sharp thermal gradients during quenching. There is no martensitic transformation, but grains, precipitate formation, and quench stresses all play roles.
Guidance in this article will clarify which method suits which alloy family.
Planning for Distortion: Design, Material, and Machining Allowance
Best Practices in the Design Phase
| Design Feature | Impact on Distortion | Recommendations |
|---|---|---|
| Balanced Cross Sections | Lower | Keep thickness and shape as uniform as possible |
| Symmetry | Lower | Use symmetrical features and hole layouts |
| Large Cutouts | Higher | Avoid unless necessary; place away from edges |
| Sharp Corners | Higher | Use generous radii where possible |
Leaving some extra stock thickness (called machinist’s allowance) for surface grinding after heat treat is standard practice. For very tight flatness or thickness tolerances, post-hardening grinding is often unavoidable.
Fixturing and Restraint: Keeping Parts Flat
Role of Fixturing
Proper fixtures:
- Prevent sagging under part’s own weight at temperature
- Minimize part movement during transformation/quench
- Ensure even exposure to heating/cooling
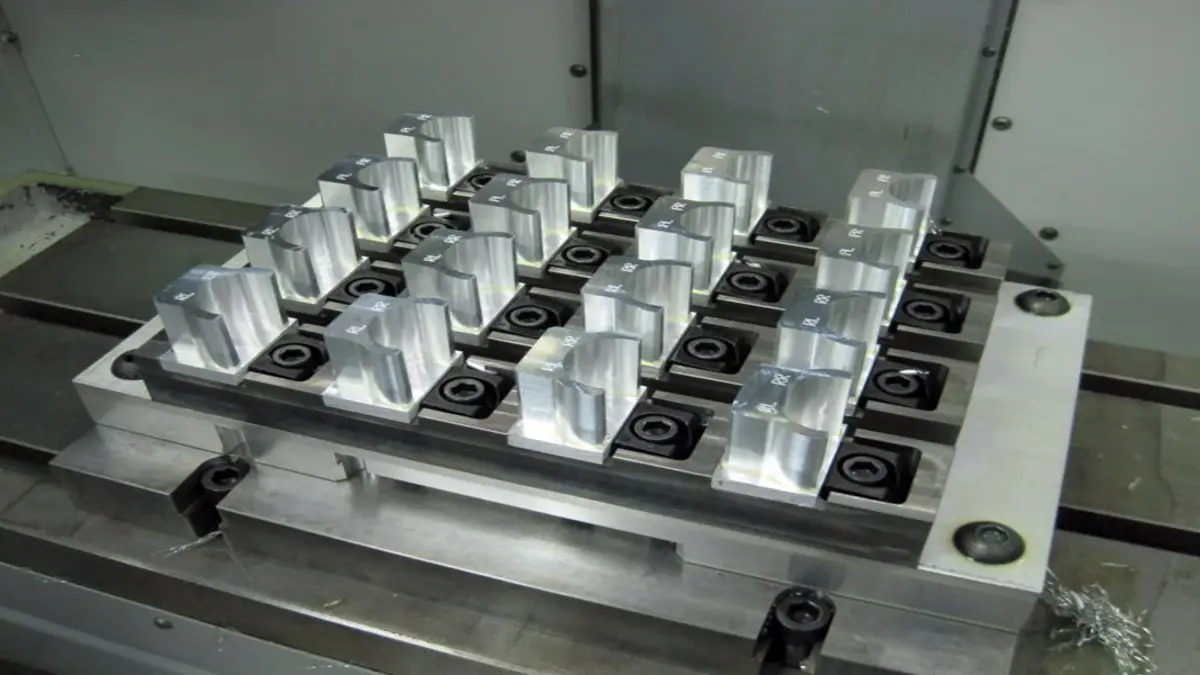
For thin flat steel parts: Stack with spacers or clamp between flat, heat-resistant steel/chrome alloy plates. For parts under 1/4" (6 mm), clamping or sandwiching helps maintain flatness, though some fixture marks may be left—ensure fixture material doesn’t react with the part.
For aluminum plates: Fixtures must be non-reactive (e.g., aluminum, stainless, or ceramic) and designed to allow free, rapid access for quenching medium without significant contact area that causes cooling spots.
Tips:
- Always allow for some movement (metal expands/contracts); don’t overtighten.
- For stacked parts, include holes for quench media flow, if possible.
- Avoid high clamping loads that might deform parts at high temperature.
Heating: Temperature Uniformity and Ramp Rate
Non-uniform heating is a major cause of warping. Ensure:
- Even furnace loading (avoid blocking airflow or close stacking)
- Slow ramp to reduce temperature gradients, especially in thick/thin transition areas
- Sufficient soak time for uniform temperature throughout
For aluminum, preheating the furnace with a dummy load or gradual ramping can reduce thermal shock.
For steel, use controlled atmospheres to prevent decarburization on thin edges (if required).
Quenching: Choosing the Right Technique for Thin Parts
Quenching is the stage most likely to cause distortion, and the selection depends on:
- Alloy and hardenability
- Part thickness
- Properties required after heat treat
Steel Parts
- Air or gas quenching is gentler and causes less warping; use for highly hardenable steels (like A2, D2) and tool steels if possible.
- Oil quenching is more aggressive—use high-temperature oils (less severe) and consider moderate agitation. For thin parts, avoid excessive agitation, which promotes uneven cooling.
- Water quench is very severe; rarely used for thin steel parts due to cracking/warping risk.
Quench between plates: For thin knives, small dies, or blades, after heating, immediately clamp or sandwich the part between two flat plates (steel or aluminum) after taking it out of the quench for a few seconds. This can straighten minor warps before final cooling.
Aluminum Parts
- Water quenching is common, but causes most warpage due to very rapid cooling. For thicker or critical parts, use aged or polymer-modified quenchants for milder cooling.
- Spray or air quenching can be used for less severe cooling and less distortion, but may risk solution loss.
- For thick or complex shapes, quench with fixtures or jigs that restrain distortion.
Quick tip: The goal is to balance sufficient cooling for property development with the lowest possible induced stresses, adjusting cooling rates as part complexity and thickness dictates.
Post-Heat Treat Correction: Surface Grinding and Clamp Tempering
Surface Grinding After Heat Treat
No matter how careful the process, thin metal parts usually require post-hardening machining—typically:
- Double-disk grinding for parallel faces
- Blanchard grinding for large or batch quantities
- Surface grinding for highest precision (often 0.08" or more is left per inch thickness to allow for cleanup)
The need for surface grinding is almost universal for tools, dies, shim stock, and critical flat parts.
Clamp and Temper (Flatness Recovery)
For some steel parts (and select aluminum with low required strength), a controlled flattening during tempering is possible:
- After quench, place the part between flat plates and clamp during the temper cycle (not during hardening)—the part is heated below the critical transformation, allowing stress relief while held flat.
- Works best for parts under about 1/4" (6 mm) thick and not overly large (under 10" across is common).
This technique can often recover flatness within a few thousandths of an inch if distortion was moderate.
Table: Comparison of Warpage Minimization Methods
| Method | Alloy Type | Distortion Reduction | Notes |
|---|---|---|---|
| Plate fixturing/clamping | Steel, Alu | High | For thin flats; avoid overtightening |
| Slow, uniform heating | All | Moderate | Prevent thermal gradients |
| Gentle (air/gas) quench | Steel (high-hard) | High | Use for highly hardenable steels |
| Water or oil quench | Alu/Steel | Low-High | Water = highest distortion (Alu), oil = moderate (Steel) |
| Post-heat treat surface grind | All | High | For critical flatness/tolerance |
| Clamp and temper | Steel | Moderate | For moderately distorted, thin parts |
Best Practices Summary: Checklist
- Design for symmetry and balanced sections whenever possible
- Leave enough stock for post-heat treat grinding
- Choose alloy and heat treat process based on desired final properties (use higher hardenability steels when minimum distortion is crucial)
- Fixture parts to provide even support and constraint, but allow for thermal expansion
- Ramp temperatures up and down slowly, soak sufficiently
- Avoid severe quenching unless required for properties
- Use clamp-and-temper or surface grinding for final flatness
Limitations and Real-World Constraints
Distortion cannot be completely eliminated—only minimized.
- Trade-off exists between rapid cooling (properties) and distortion
- Some materials and geometries are more sensitive than others
- Cost-benefit: Grinding and machining after heat treat is expensive but may be necessary for the most critical applications
Conclusion
To keep thin metal parts as flat and dimensionally stable as possible through heat treatment, combine process planning, fixturing, and processing technique with a pragmatic acceptance that some post-heat treat finishing is often mandatory. The most cost-effective and precise approach is to anticipate distortion and engineer both the part and the process to make correction straightforward at the end.
For additional resources or solutions specific to your alloy and application, contact a metallurgical engineer or commercial heat treat service with experience in precision flatwork.
If quench anyway other than vertically one side will cool before the other and warp so that it looks like a Frito.
References
8 Reasons Steel Parts Can Warp in Heat Treat | Precision Machined Products Association. (n.d.). pmpa.org. https://www.pmpa.org/8-reasons-steel-parts-can-warp-in-heat-treat
A2 heat treating, warping parts!. (n.d.). practicalmachinist.com. https://www.practicalmachinist.com/forum/threads/a2-heat-treating-warping-parts.246345
Control of distortion in heat-treated aluminum | Thermal Processing Magazine. (n.d.). thermalprocessing.com. https://thermalprocessing.com/control-of-distortion-in-heat-treated-aluminum
heat treating thin plates. (n.d.). practicalmachinist.com. https://www.practicalmachinist.com/forum/threads/heat-treating-thin-plates.315596
HELP- how to prevent warps during heat treat??. (n.d.). reddit.com. https://www.reddit.com/r/Bladesmith/comments/p7tvr7/help_how_to_prevent_warps_during_heat_treat
Prevent & Reverse Distortion in Heat Treatment | AST-Paulo. (n.d.). paulo.com. https://www.paulo.com/resources/strategies-for-preventing-part-distortion-in-heat-treatment
Warped thin parts after heat treat. (n.d.). eng-tips.com. https://www.eng-tips.com/threads/warped-thin-parts-after-heat-treat.205008
Why Thin Metal Parts Warp During Cutting and How Shops Prevent It! – 1CUTFAB. (n.d.). 1cutfab.com. https://1cutfab.com/blogs/laser-cutting/why-thin-metal-parts-warp-during-cutting-and-how-shops-prevent-it